Secure Ubiquiti UniFi Controller / CloudKey with an Let’s Encrypt certificate – The Cloudflare way
There are tons of tutorial’s out there if you’re searching for “unifi controller let’s encrypt” but none of the ones I found are suiting my needs.
My Ubnt controller runs on my raspberry pi 3 and Cloudflare is in charge of handling my DNS entries.
1. Get the Cloudflare Global API-key
Login to https://dash.cloudflare.com
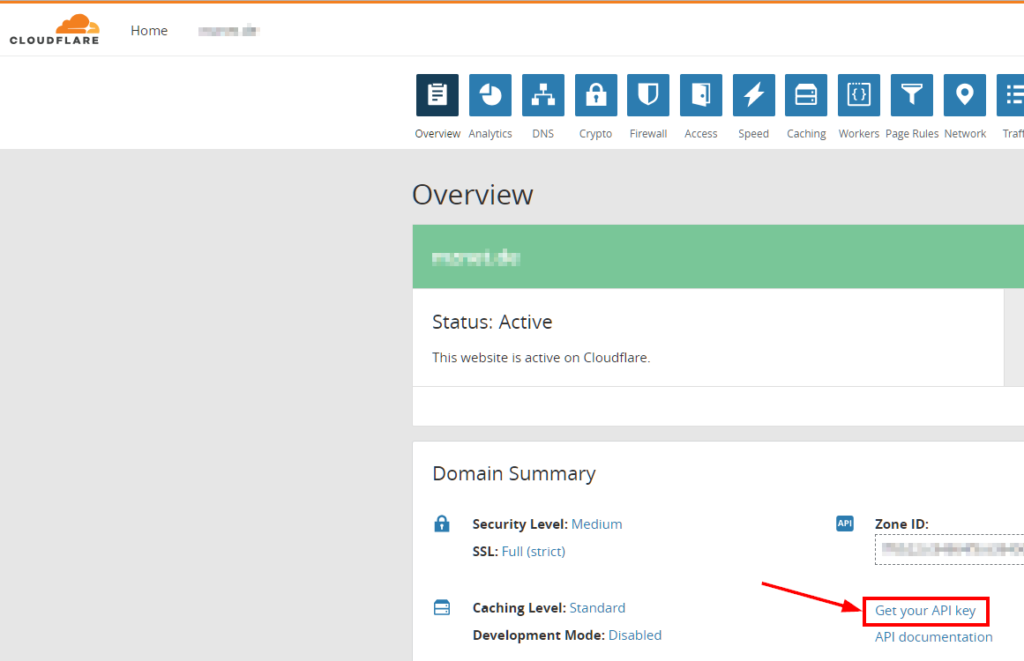
Select your site then hit “Get your API key”

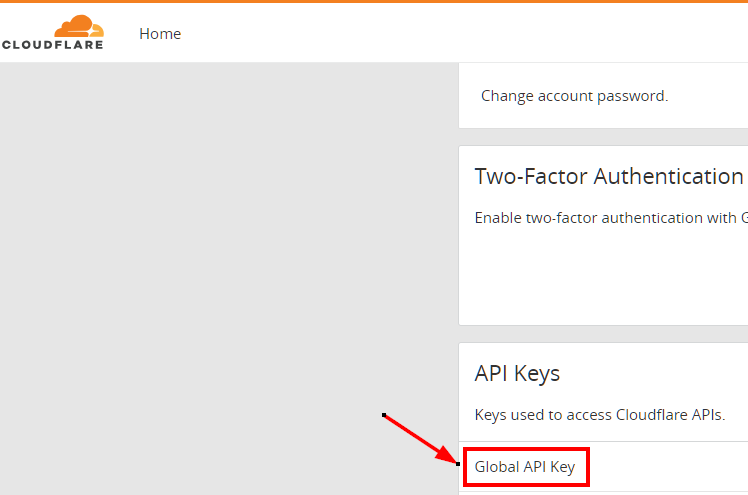
Scroll to “API Keys” and request the “Global API Key”

Copy your global API key and save it in your pwd-mgr or your favorite .txt file.
2. Commands on linux box
SSH into your controller:
|
1 2 3 4 5 6 7 8 9 10 11 12 |
# Install acme.sh: curl https://get.acme.sh | sh # change directory cd .acme.sh # set API key and email login env variables: export CF_Key="Cloudflare_Global_API_Key" export CF_Email="Your_Email_Accessing_Cloudflare" # issue the desired certificate (make sure to change -d according to your needs!): ./acme.sh --issue --dns dns_cf -d ubnt.mydomain.tld |
The output of the –issue command should end with the location of your newly created cert files:
|
1 2 3 4 5 |
[...] [Tue Jun 26 21:57:53 CEST 2018] Your cert is in /root/.acme.sh/ubnt.mydomain.tld/ubnt.mydomain.tld.cer [Tue Jun 26 21:57:53 CEST 2018] Your cert key is in /root/.acme.sh/ubnt.mydomain.tld/ubnt.mydomain.tld.key [Tue Jun 26 21:57:53 CEST 2018] The intermediate CA cert is in /root/.acme.sh/ubnt.mydomain.tld/ca.cer [Tue Jun 26 21:57:53 CEST 2018] And the full chain certs is there: /root/.acme.sh/ubnt.mydomain.tld/fullchain.cer |
Now, integrate the newly created certs to unifi with builtin “unifi”-hook:
|
1 2 |
# install certificates: ./acme.sh --deploy -d ubnt.mydomain.tld --deploy-hook unifi |
Let’s have a look if everything went smoothly and check the controller if there is a green “Secure” lock:
https://ubnt.mydomain.tld:8443/
![]()
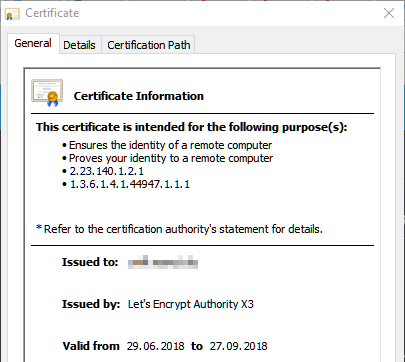
If you check the certificate it should state something like this:

WTF! The certificate is just valid for 90 days? I have to repeat all the steps above again!?
Nope!
acme.sh created a cronjob which is doing everything for you:
|
1 2 3 |
# check cronjob: crontab -l 57 0 * * * "/root/.acme.sh"/acme.sh --cron --home "/root/.acme.sh" > /dev/null |
After upgrading the controller firmware make sure the cronjob is still present (crontab -l).
If not, easily install the cronjob again:
|
1 2 |
# install cronjob: ./acme.sh --install-cronjob |
[UPDATE: 09.07.2018 22:23]
I just upgraded my Controller from 5.7.23 to 5.8.24 and the cronjob for updating the SSL cert still exists.
3 thoughts on “Secure Ubiquiti UniFi Controller / CloudKey with an Let’s Encrypt certificate – The Cloudflare way”
Daniel 08-02-2019 at 14:00
Hey thanks for the article,
Everything seems to work fine though i get the following warning
Warning:
The JKS keystore uses a proprietary format. It is recommended to migrate to PKCS12 which is an industry standard format using “keytool -importkeystore -srckeystore /usr/lib/unifi/data/keystore -destkeystore /usr/lib/unifi/data/keystore -deststoretype pkcs12”.
[Fri Feb 8 04:55:00 PST 2019] Import keystore success!
[Fri Feb 8 04:55:00 PST 2019] Run reload: service unifi restart
[Fri Feb 8 04:55:44 PST 2019] Reload success!
[Fri Feb 8 04:55:44 PST 2019] Success
Markus Zehnle 04-09-2019 at 15:10
Hi Daniel,
thanks for your comment.
Are you using JDK9?
Oracle changed the default keystore in v9 from JKS to PKCS12.
https://blogs.oracle.com/jtc/jdk9-keytool-transitions-default-keystore-to-pkcs12
debian – Updating SSL Certs with PKCS12 or PEM via Bash Script – ITTone 04-05-2022 at 07:21
[…] More Clarifications The SSL auth is being done through Cloudflare using these instructions originally for Unifi. These can be used until the actual renewal. https://www.markuszehnle.com/2018/07/02/secure-ubiquiti-unifi-controller-cloudkey-with-an-lets-encry… […]